
How To Weld, Intersect, Subtract, Crop, Subtract All, and Divide in Silhouette Studio
Posted by Savana Price on 11th Feb 2020
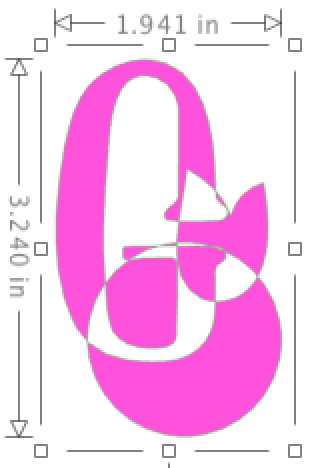
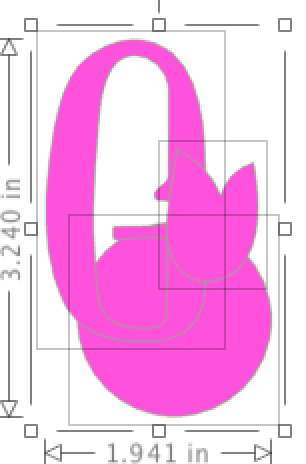
In this article I will explain how to Weld, Intersect, Subtract, Crop, Subtract All, and Divide in Silhouette Studio. Read the instructions carefully and reference the demonstration images for a better understanding in your cutting machine software. In this demonstration I will be using a DXF image so you will only see the outlines. This will help you see exactly where and how the shapes are transforming.
When you open your design in Silhouette Studio you will want to select the shapes you wish to alter and then go to: Object ➜ Modify ➜ Modify Options… Here you will see all of your Modify options to Weld, Intersect, Subtract, Crop, Subtract All, and Divide. You will also find Detach Lines as well as Compound Paths options to Make and Release.
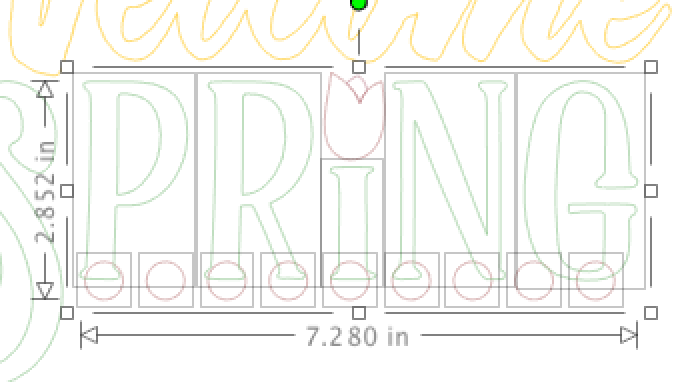
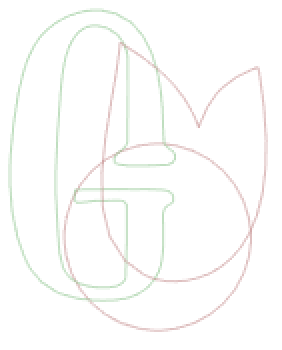
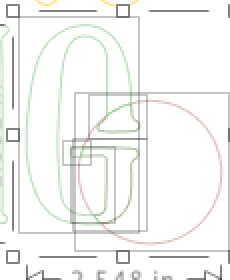
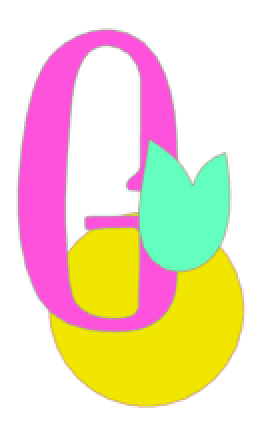
Please reference my initial starting design below

Weld: combines 2 or more shapes into one. Select the shapes you wish to weld and select Weld in the Modify Options dialog box. Otherwise you can select the shapes that you wish to weld and right click your mouse to select the Weld option.
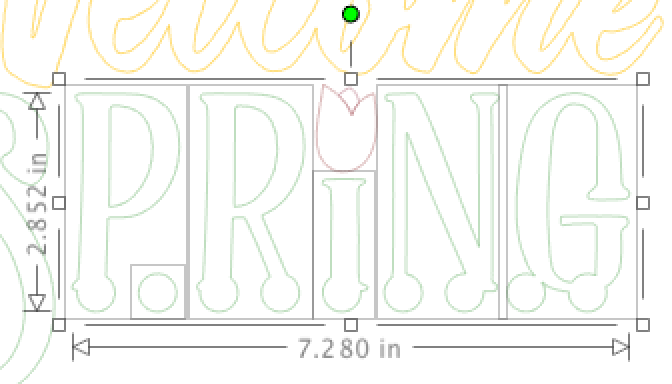
In the design below I overlapped some of my shapes and selected all of the ones I wanted to Weld.
I then welded them together which created merged shapes where overlapping took place.
Intersect: leaves only the overlapping part of 2 shapes. If part of your shape is not overlapping another shape it will be excluded. To intersect you will overlap your shapes and select them. You will then select Intersect in the Modify Options dialog box.
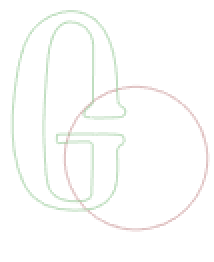
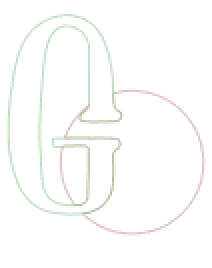
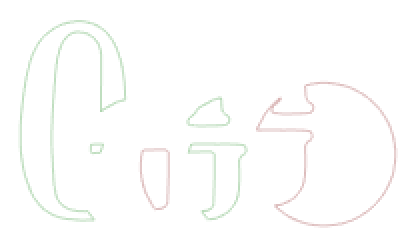
In the example below I overlapped the letter G and a circle.
Once intersected, this is my final result. Only the overlapped parts were included.

Subtract: will exclude the top overlapping shape and cut into your bottom shape. You will want to make sure to Bring to Front the part of the shape you want to be cut out or Send to Back the shape you want to have cut into. You will select your shapes that are overlapping and then select Subtract in the Modify Options dialog box.
I selected my letter G and the overlapped circle. I then selected the Subtract option.
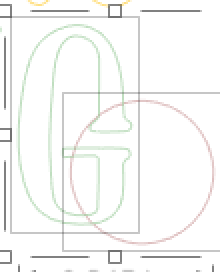
This is my final result.

Crop: is similar to Intersect except you can use more than 2 shapes. This option will leave you with only the intersecting portions of your shapes. If there are parts of your shapes that are not layered over with another shape, those parts will be excluded. You will overlap 3 or more of your shapes. Then you will select all of your shapes and select Crop from the Modify Options dialog box.
I overlap and select my shapes which are G, a circle, and my flower petal.
Once I select Crop this is my final outcome. The parts of the shapes that did not have an overlap were not included.
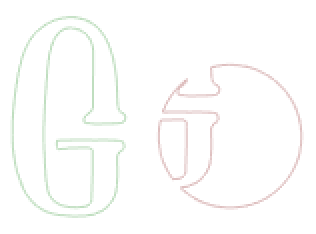
Subtract All: will subtract the overlapping parts of layered shapes that are hidden by other shapes. You will want your most important shape that you do not want cut out at the very front (Bring to Front). You will then overlap your shapes, select all of them, and then select Subtract All in the Modify Options dialog box. You will now be able to spread the shape pieces out.
I selected my G and the overlapping circle.

I then selected the Subtract All option. You can see how the outlines changed.
This is what it looks like when I spread out the shapes.
Divide: is similar to Subtract All but instead of leaving the front shape alone, it will divide or separate out all overlapping pieces of all of your shapes. You will overlap your shapes how you wish. You will then select your shapes and select Divide in the Modify Options dialog box. You can now spread out the pieces. You will see that you have every single part of your shapes that were not overlapping as well as the intersecting parts. Now they are all separated out for you.
I selected the letter G and the circle.

This is what my display window looks like when I selected the Divide option.
I can now spread out each individual piece.
The easiest way to learn what the Modify Options do is by trying them out! It will take some trial and error in the beginning – so make sure to have fun with it.
Here are a few other notes about what Detach Lines, Make Compound Path, and Release Compound Path do.
Detach Lines: detaches the outline of a shape and creates a new shape. You will select your shape and then select the Detach Lines tool in the Modify Options dialog box. You will then be able to select and drag your shape out to see there is a new shape.
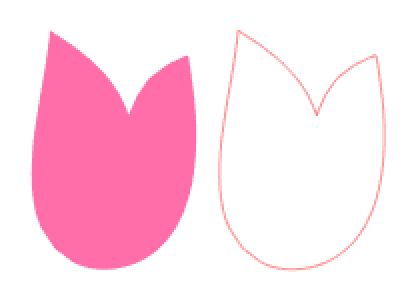
To detach lines you will need to make sure your shape is filled with color. This is my starting shape.
After I select my shape, I can select Detach Lines. I can now pull one shape away showing me that I now have 2 shapes.
Make Compound Path: combines selected shapes into one shape. Parts of the shapes that overlap together are punched out or cut out. Usually you will only want to use Make Compound Path when you have elements or shapes that are spread out. To use Make Compound Path you will select your shapes and then select Make Compound Path in the Modify Options dialog box.
I overlapped my shapes how I want and put some fill color in them to show you the difference.
Then I selected my shapes and selected Make Compound Path. This is my final result. As you can see the overlapped once parts were excluded and the non-overlapped as well as the overlapped 3 times parts were included into the shape.

Release Compound Path: will fill back in those cut out areas of your shape that you used Make Compound Path on. The parts that were cut out will now be back in their own layer. To Release Compound Path you will want to select the shapes that you had already used Make Compound Path on and then you will select Release Compound Path in the Modify Options dialog box.
This is the final result of my shapes when I used Make Compound Path.
Once I select all of my shapes, I choose Release Compound Path. This is my final result. The shapes are now separated back out.
See Also:
- How to Group, UnGroup, Flatten, and Unflatten in Cricut Design Space
- How to Slice, Weld, Attach, Contour, Duplicate, and Delete in Cricut Design Space

![]()