How To Thicken Fonts in Illustrator for Cricut Design Space and Silhouette Studio
Posted by Savana Price on 21st Jan 2020
If you are a crafter one of the most important things to learn is how to thicken a font before using it in your cutting software. In this particular tutorial I will talk about how to thicken fonts for Cricut Design Space and Silhouette Studio. Why should you thicken a font before cutting? Thickening a font helps your machine and blade maneuver the design a lot easier. If you use a thin font and try cutting it out you risk tearing the paper, hurting your blade, or even sabotaging your machine. Don’t worry, even the seasoned crafter runs into this issue from time to time. Sometimes a font looks thick enough but your machine doesn’t think so!
Keep in mind that if you are making paper crafts (or using many other mediums as well) that your fonts of choice may be limited due to negative space. For instance, you may be able to cut the letter B out in itself, but if you are trying to put the letter B on card stock to read, the negative space will dominate and you will just have the outer shape of the letter B. One of the only options would be to use the cut out letters and manually glue them on. Another option is to use a stencil font for your project. You can also glue back in the missing pieces, but sometimes that just doesn’t work as perfectly as you might hope for.
If you are using vinyl or heat transfer vinyl this will not be an issue. You can use any font you want! Just remember to mirror the design before cutting if you are using HTV! Also take some extra time when weeding your design so you aren’t missing any small pieces like the dot on an i.
If your font is too thin you will want to thicken the font before cutting. This simple task is often overlooked. Thickening a font in your cutting software is relatively easy. Just follow my simple steps!
How Do I Thicken a Font in Cricut Design Space?
Unfortunately, there isn’t a way to thicken a font in Cricut Design Space. Your font may have a “Bold” option under Style. If it does – you may be in luck and not have to go outside of Design Space to work with your font. I will explain how you can thicken a font in Illustrator to use in Cricut Design Space down below.
How Do I Thicken a Font in Silhouette Studio?
There are 2 easy ways of thickening a font in Silhouette Studio.
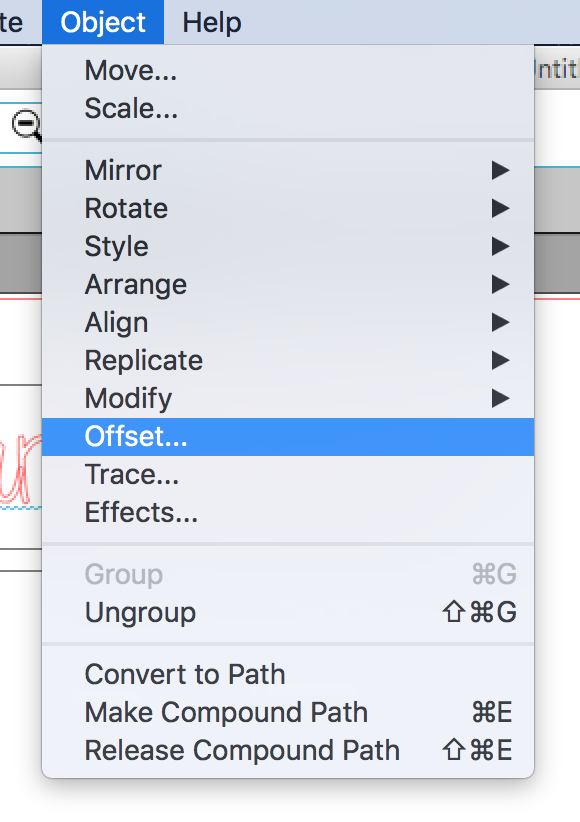
The easiest way is to select your design and play with “Offset” by going to Object -> Offset.
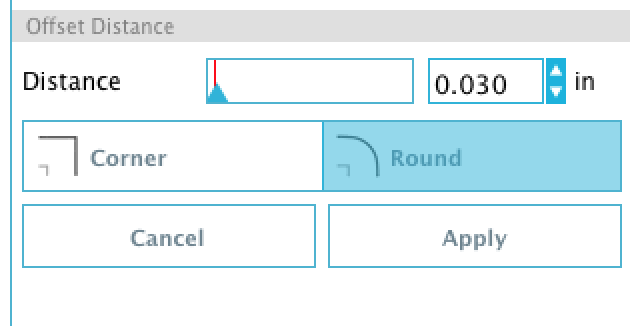
Click on "Offset" in the Offset dialog box.
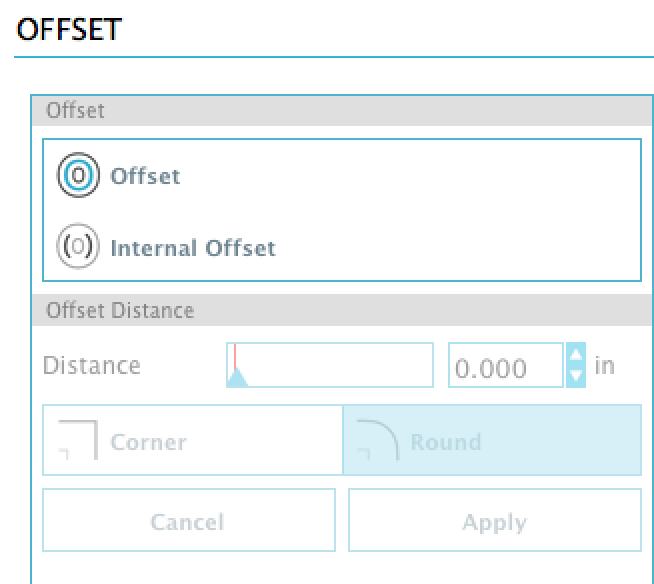
Change the “Distance” to anywhere between about .01 to .05 and click “Apply”.
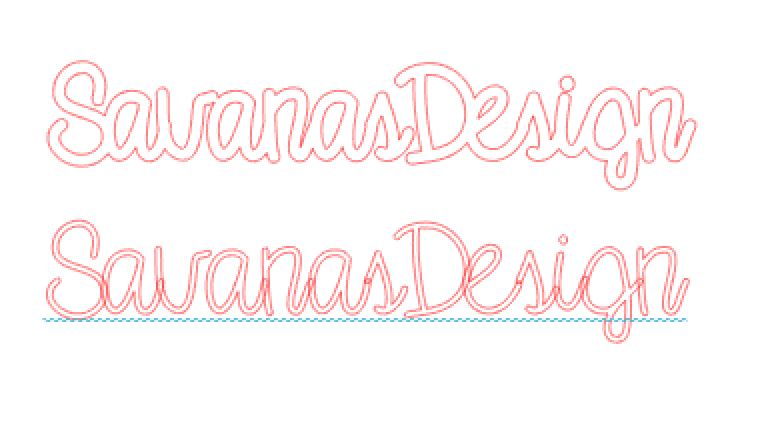
You will then drag the 2 layers away from each other and delete the thin layer.
The next way to thicken a font in Silhouette Studio is by using the “Line Style”. Select your design or font and click on the Line Style button to open up the Line Style dialog box.

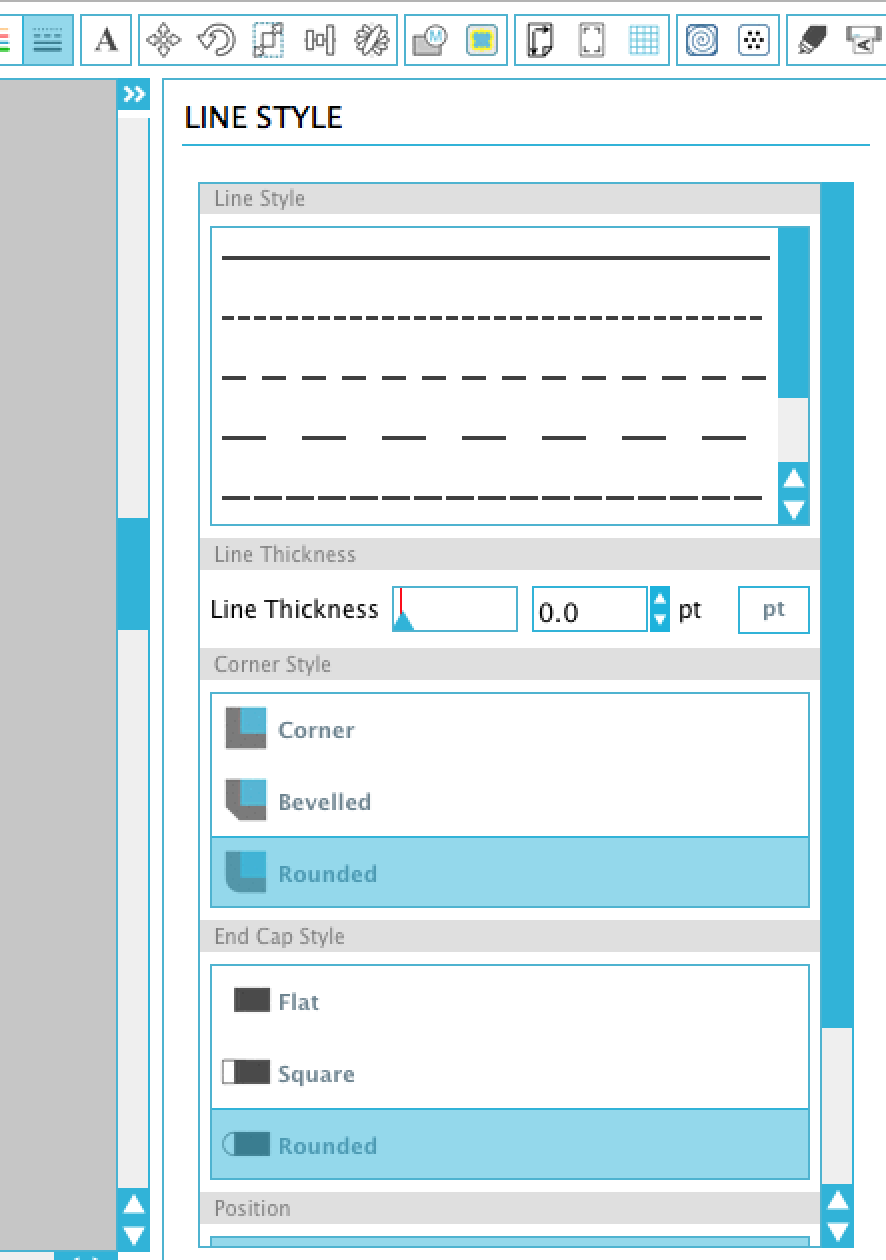
You will then increase the Line Thickness. You will probably stay in the 5 to 10 pt range.

Then you will fill your font with color.

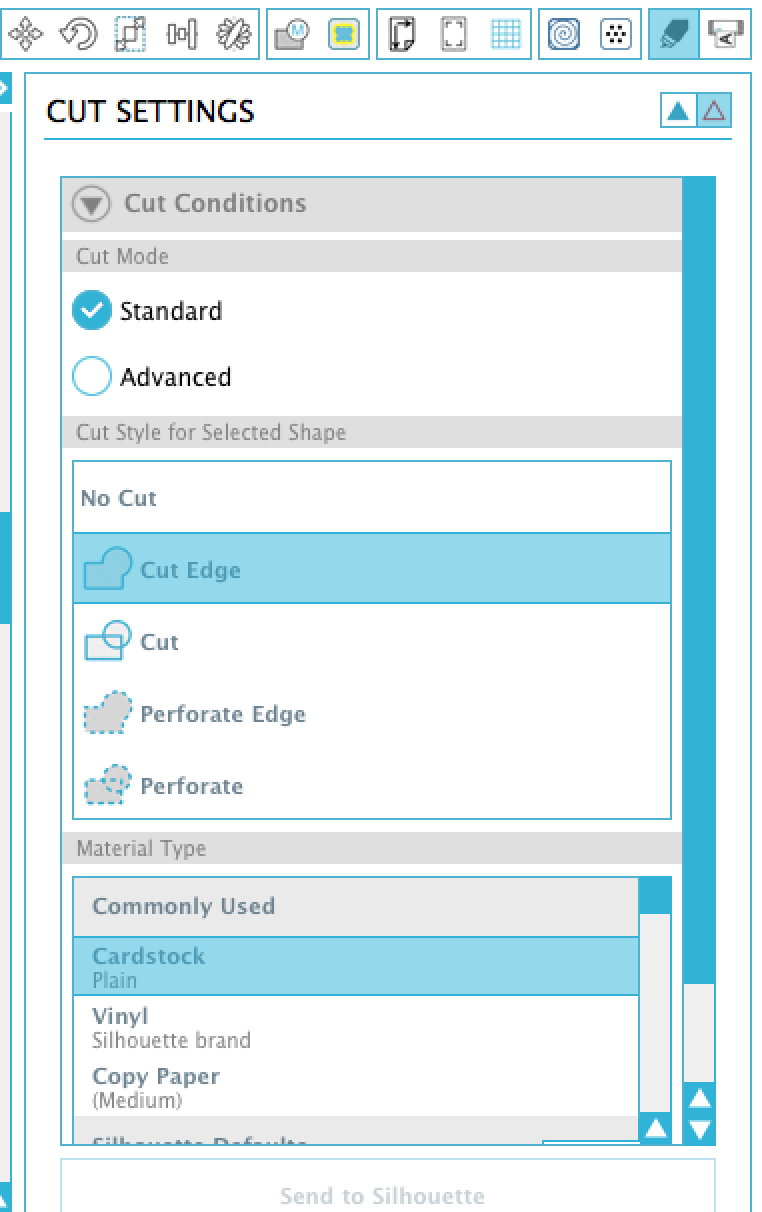
Next you will choose “Cut Edge” under Cut Style for Selected Shape.
How To Thicken Fonts in Illustrator for Cricut Design Space and Silhouette Studio
Step 1
Determine what font you are going to use or plan to use. When possible, go for a relatively thick font already. In my demonstration I will use a thin script font. You can buy Say It Softly for only $1.00!
Step 2
Open Adobe Illustrator and type out your text with the font you want to use.
Step 3
Select your text and then adjust the stroke.
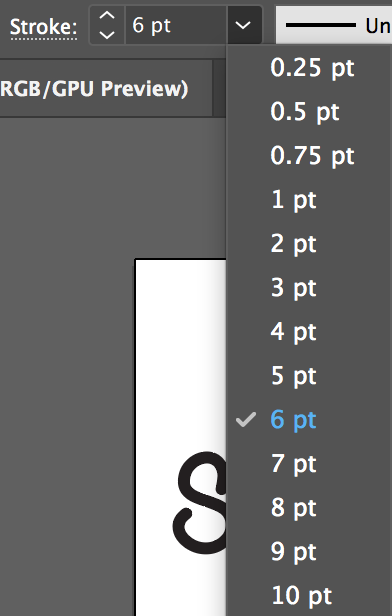
Step 4
Select your design. Click your right mouse button and select “Create Outlines”
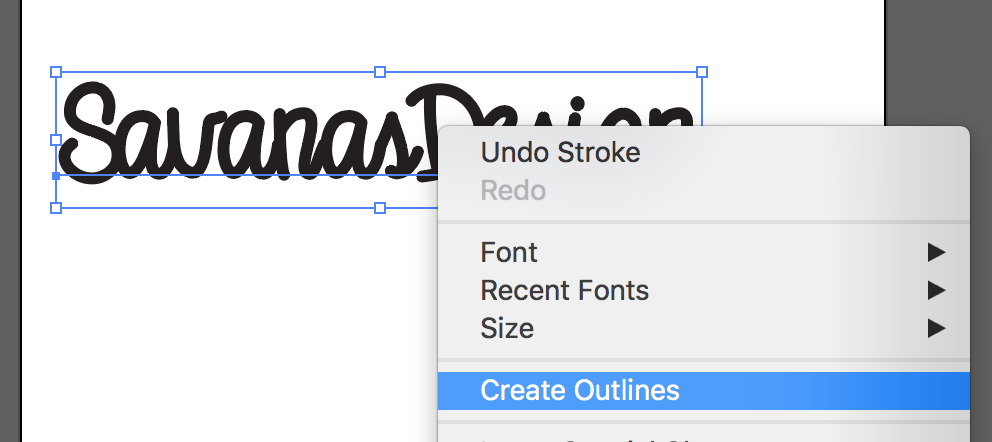
Step 5
Select Object -> Path -> Outline Stroke
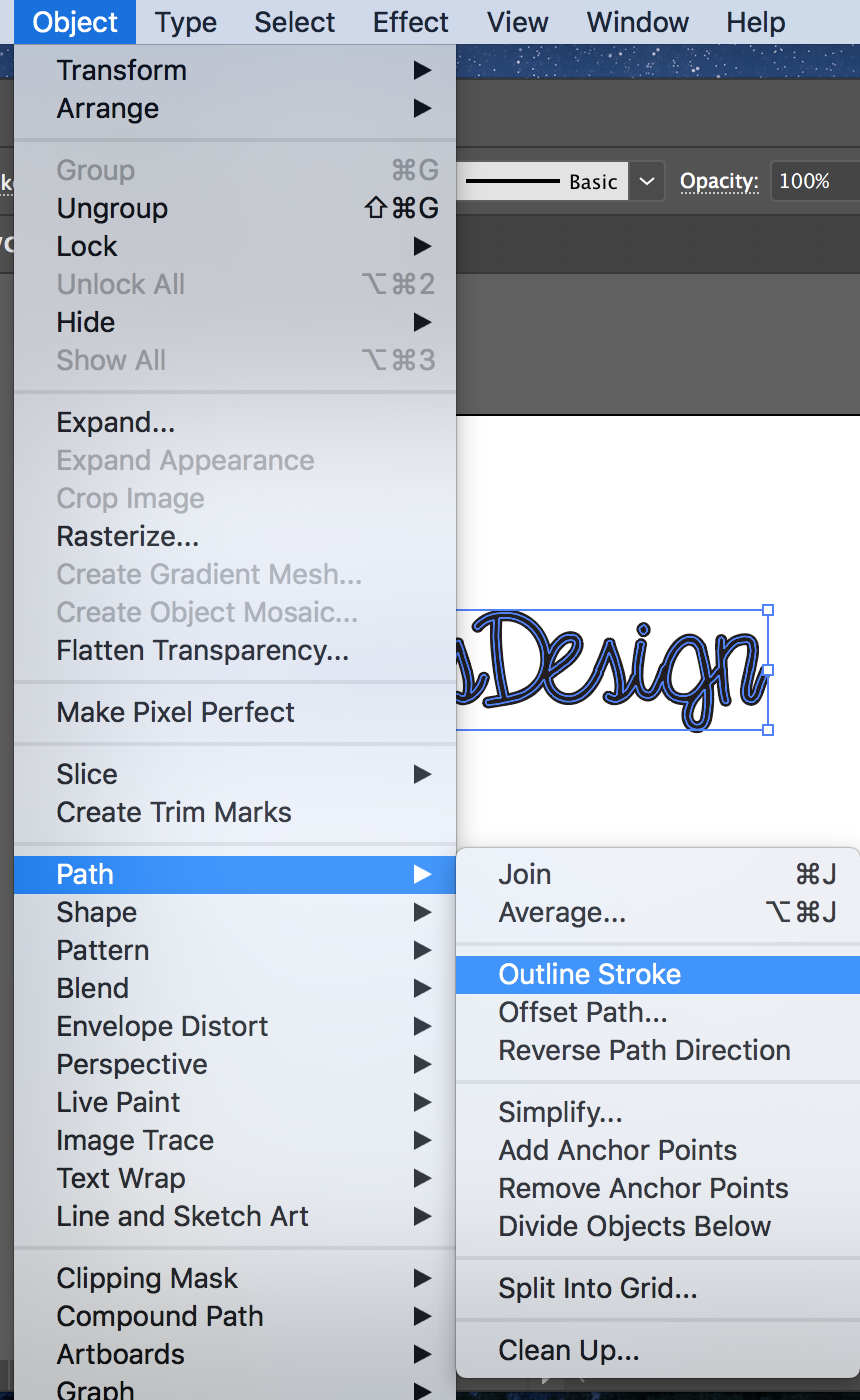
Step 6
In Pathfinder Select the Unite button.
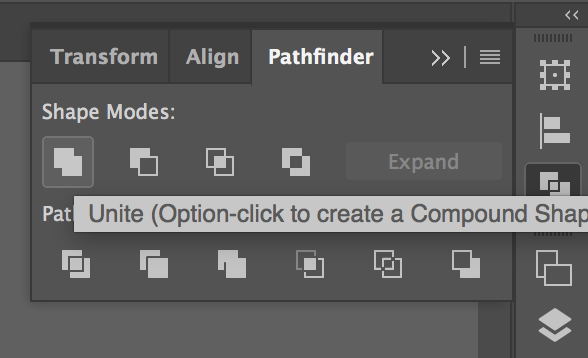
Here is my final product. You will then want to save out your design as an SVG or another format for cutting!

Here are some other common problems that I run into when cutting text.
Problem: My Font Is Too Small
Solution: Enlarge the font. Sometimes there is no way around this.
Problem: Too Many Anchor Points or Difficult Font
Solution: You may need to use another font or trace the font. If you are skilled in Illustrator you can "Smooth" the anchor points as well.
Problem: Wrong Cut Setting
Solution: Search for your cut setting online. There are many resources and this can get complicated!
Problem: Medium Doesn’t Like The Font
Solution: This is a very common problem that I often face. Sometimes I need to change the medium I am using (like go from a thick cardstock to a thin cardstock) or change my font altogether.

